Tapestry weaving
Materials
blunt needle
cardboard (stiff)
crayons or felt-tip pens
fork or comb
paper (blank)
scissors
stick needles (three or more)
string
yarn (two or more colors)
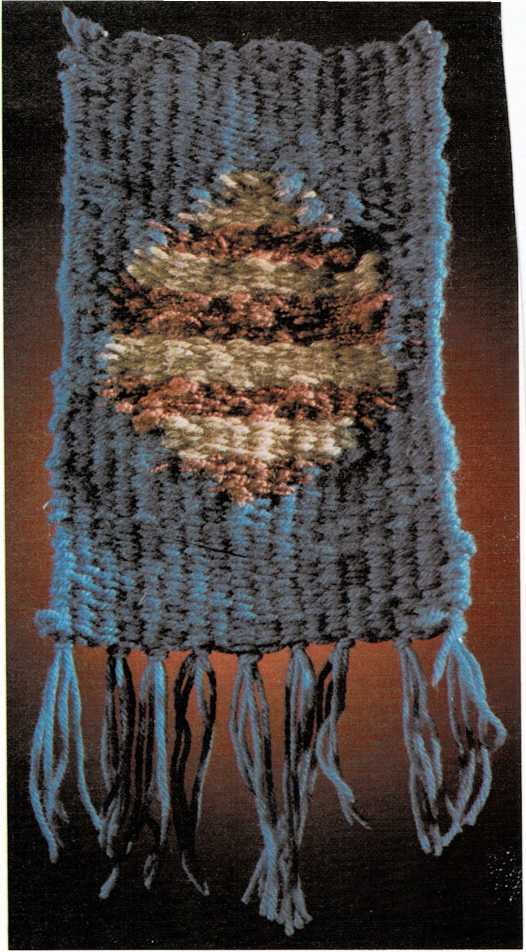
A tapestry is a woven picture. Read weaving (page 178) before you
begin this project.


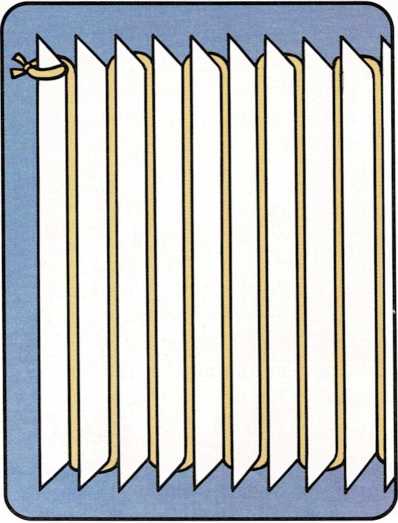
1 Make a loom (see loom, page 178).
- Cut a piece of paper the same size as your loom. Draw a line around
the paper, leaving a 1-inch (2.5-cm) border.
Inside the border, draw and color the design or picture you want to
weave. For your first tapestry, it is best to start with a two-color
design—one color for the background and another color for the design.
- For the warp, tie and wind string on the loom as shown.
pins or thumbtacks
scissors
tin can, jar, or flowerpot
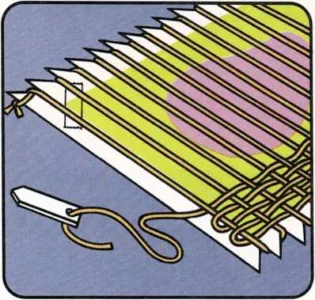
Tape your drawing under the warp strings. Use it as a guide.
Begin weaving at the bottom. Weave eight or more rows of background
in a plain weave (see plain weave, page 179). Beat the threads
together as you weave (see beater, page 178).
Mix different weave patterns to create interesting textures. For the
picture, use a plain or basket weave. Always use the plain weave for the
background.
6 Use a different stick needle (see stick needle, page 178) for
each color yarn in the picture. Use two needles for the background, one
to weave the right-hand side of the background and one to weave the
left-hand side.
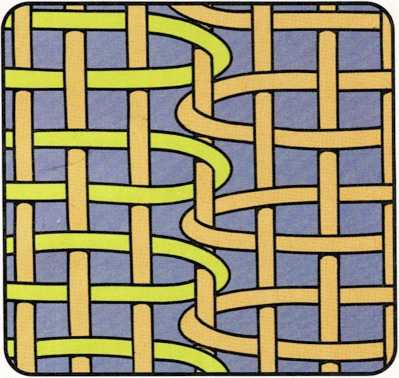
Weave your design row by row. Link the background color with the picture
color, as shown. Always link one background row with each picture row.
Beat the threads as you weave.


7 To finish off your tapestry at the top, weave eight or more rows
of background in a plain weave.
When you are finished weaving, carefully unhook each loop from around
the notches. Loop the knotted ends around the last row of weaving, as
shown. Tuck in the ends.
In the Middle Ages, tapestries were used as wall hangings in castles.
You can use your tapestry as a wall hanging, pillow cover, place mat, or
seat cover. You can also weave a bag (see page 188) with a tapestry
design.

