Ideas with colors, cloth, and thread
Potato printing on cloth is a creative way to make unusual presents
everyone will like. You can print T-shirts, scarves, tablecloths,
napkins, place mats, and wallhangings. Or, you can print cloth to make
into pillows or stuffed toys.
Potato printing on cloth is done just like potato printing on paper
(see potato prints, page 80). But, you must use special textile paints
that won’t wash out. You can buy these paints in art, hobby, and craft
shops. Be very careful when you print with this paint. Follow the
instructions on the package. Stains and mistakes will not wash out.
When you’re finished printing and the paint is dry, use a warm iron to
press the fabric. Press each side for about five minutes.
If you’re printing a shirt, put several layers of newspaper inside the
shirt before you start to print.
Tie-dyeing is a special way of dyeing cloth to get patterns and
designs. Tie-dyed presents, such as T-shirts, scarves, tablecloths and
napkins, place mats, and wallhangings make creative, one-of-a-kind
gifts.
Gather the cloth in several places. Then wind rubber bands or tie
string around the bunched-up cloth. You can tie the bunched cloth once,
twice, or as many times as you choose. Each time you tie the cloth an
extra time or a different way, ypu’ll get a different design.
Dye the cloth in no-boil fabric dye. Make the dye solution stronger
than the instructions tell you by mixing more dye with less water.
Put the cloth into the dye. Let the cloth soak until it is a little
darker than the color you want. Then wring it out. To make tie-dye
projects with several different colors, dip the bunched and tied ends of
the dyed cloth in different color dyes up to the first, second, or third
knots. Wring out each bunch after you have dyed it.
Finally, rinse the cloth in cold water until the water is clear. Untie
the cloth and hang it up to dry. Then press it with a warm iron.
Gifts to Give \|


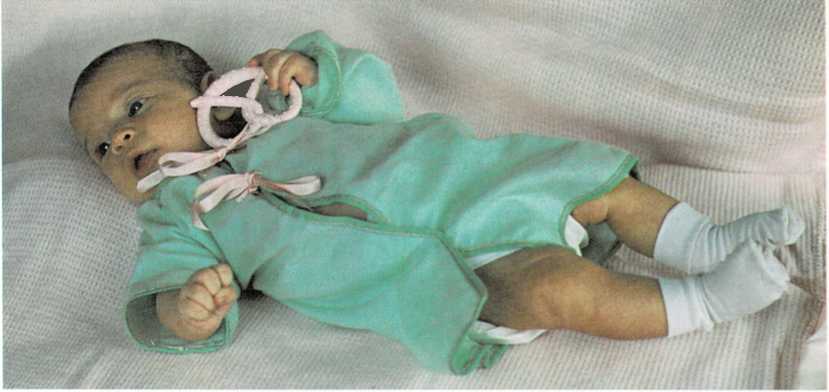
Kimono tops will please the mother of any baby up to the age of two.
You’ll need yard (80 cm) of cotton or flannel, 1 yard (90 cm) of ribbon,
and double-fold seam binding.
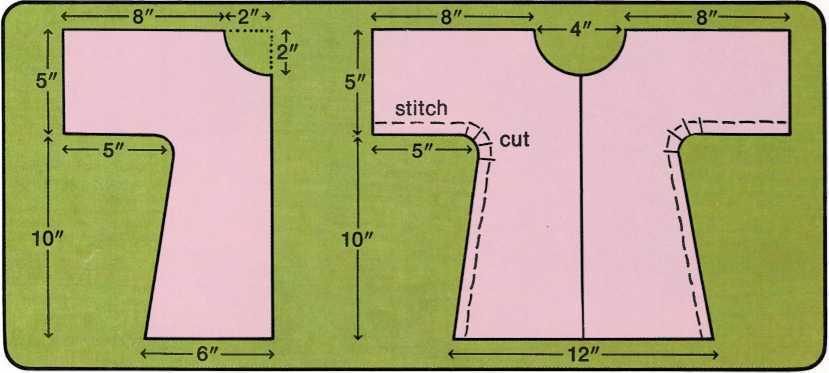
Cut the cloth so it is about 30 inches (80 cm) long and 24 inches (60
cm) wide. Fold the cloth in half the short way. Draw and cut out the
kimono and the neck opening so it looks like the one in the picture.
Then cut a slit down the front of the kimono.
With the right sides of the cloth together, sew the side seams and the
sleeve seams (see backstitch, page 156). Make the seams about f inch (2
cm) wide. Where the side seams turn into the sleeve seams, make little
cuts in the seam from the edge of the cloth up to the thread.
Pin double-fold seam binding around the neck opening. Sew it with the
backstitch. If you have difficulty doing this, ask a grown-up for
help.
Hem the front slit, sleeves, and the bottom of the kimono. Turn under
a •j-inch (1.7-cm) hem and pin it down. Tuck under the raw edges to make
a little roll. Sew the roll down (see hemming stitch, page 156). Or, sew
double-fold seam binding around the edges like you did around the
neck.
Sew ribbons on each side of the front slit. Add any decorations you
like.

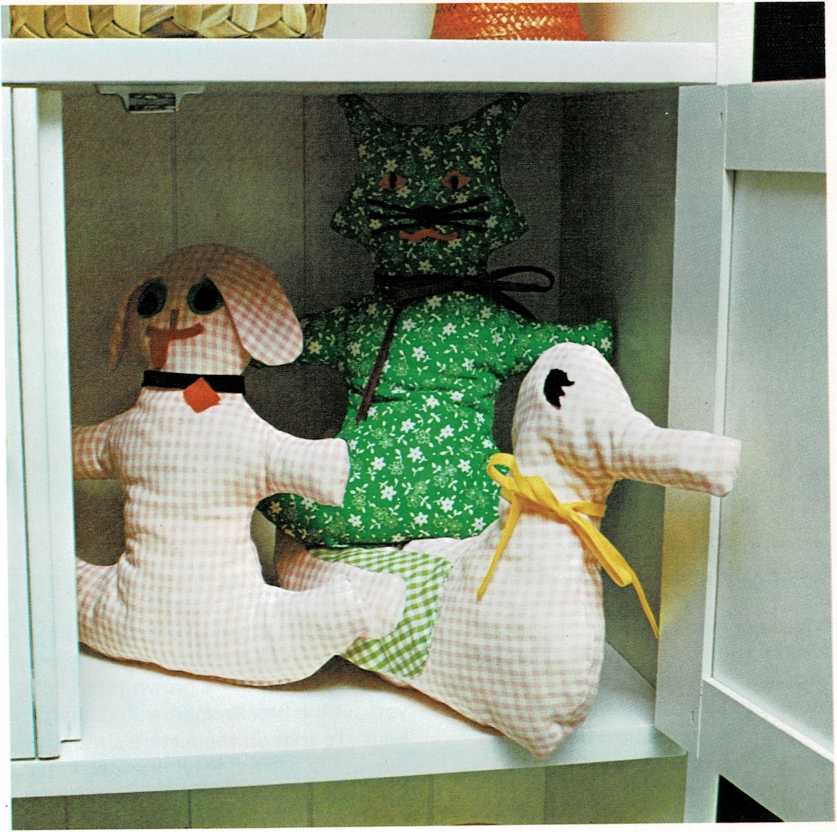
Stuffed animals will keep babies, teen-agers, and everyone
in-between company when the party is over. Calico Cat, Checked Puppy,
and Waddly Duck will bring a smile to even the most hard-to-please
person. You can stitch them up in no time.
Cut out the shape from a piece of doubled cloth. With the right sides of
the cloth together, sew around the shape (see backstitch, page 156).
Leave an opening so you can push in the stuffing. Wherever the seams
curve, make little cuts in the seam from the edge of the cloth to the
thread. Be careful not to cut the thread. Push the shape through the
opening so the right sides are out.
Stuff the shape with shredded foam. Then turn in the edges along the
opening and sew it closed with the backstitch.
Sew or glue on eyes, a nose, and a mouth, and any other decorations you
like.


