
Doll’s poncho
Materials
cloth
cloth scraps
embroidery thread
felt-tip pen
needle (crewel, darner, or tapestry)
ruler
scissors
straight pins
yarn
- Choose a piece of cloth that is wide enough to cover your doll’s
shoulders and long enough to go below its waist. If you use cloth
that unravels easily, such as burlap, stitch around the edges with
the overcast stitch (see overcast stitch, page 156). Finish off
your sewing (see finish off, page 155).

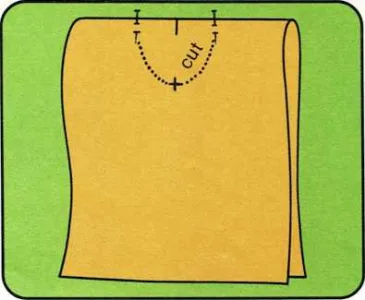
- Fold the cloth in half so that the short ends meet evenly. Now find
the center of the folded edge and make a mark there with a felt-tip
pen.
Measure an equal distance from each side of the center mark. Put pins at
these two points. The distance between the pins must be a little wider
than your doll’s head.
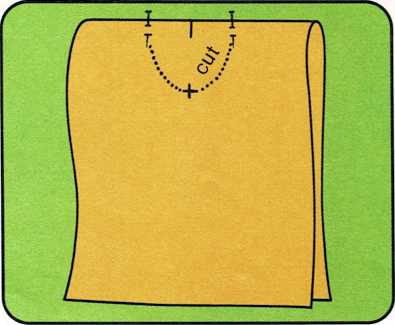
Measure the distance between the pins. Now measure the same distance
down from the center mark. Make a mark here. Using this mark and the
pins as guides, draw a U-shaped or V-shaped neck opening. Keep the cloth
folded and carefully cut out the neck opening.

Stitch around the edges of the neck opening with the overcast
stitch. Finish off your sewing. Now decorate the poncho with
different kinds of stitches, or use the overcast stitch to sew on
shapes cut from cloth.Use four short pieces of yarn to make ties for the poncho. All the
pieces should be the same length. Make a knot at both ends of each
piece of yarn. Sew an end of each piece of yarn to the poncho, as
shown. Place the poncho over your doll\’s head. Tie the pieces of
yarn together to fasten the poncho.
If you have a large piece of cloth, try making a poncho for yourself.
