

Helpful hints
The following information will help you to make the projects in this
section. If a special skill is needed, the directions will tell you the
page on which that skill is explained. For example: “Roll a lump of clay
into a coil (see coil, page 110).” If you do not know how to make a
coil, you will find directions on page 110.
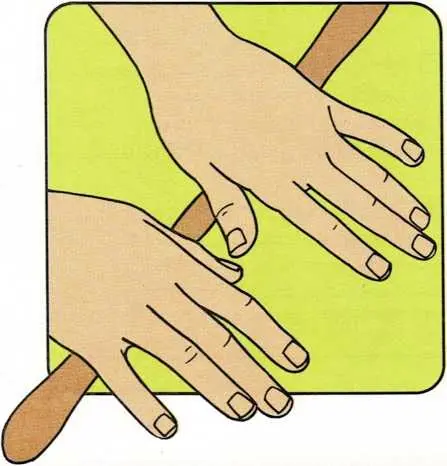
You do not need any special tools to work with clay. Your hands and
fingers are your best tools. To do things your fingers can’t do, you can
use objects found around the house. Toothpicks, orange sticks, combs,
string, pencils, a fork, a spoon, a knife, hairpins, cookie cutters, and
a rolling pin are all good tools to use.
When you play with clay, it’s a good idea to use a work base. It
lets you turn your model without picking it up. A wooden board, a piece
of heavy cardboard, or a sheet of paper makes a good work base.
Clay is a soft material that is easy to shape. There are several
different kinds of clay. Some you can buy in art stores, and others you
can make in your kitchen.

Hardening clay is ordinary earth clay. You can buy this clay in art
stores and hobby shops. It is the best clay for modeling.
If it begins to crack while modeling, hardening clay should be brushed
or moistened with water. Pieces of this clay must be scored (see
score, page 111) and moistened with water before they will stick
together.
Hardening clay dries to a stiff, hard finish. Models made from this clay
are very strong. If handled with care, they will not break easily. When
dry, this clay can be painted with tempera paint (see tempera paint,
page 66).
Modeling clay, or Plasticine, is an artificial clay often used in
place of hardening clay. You can buy this clay in art stores, hobby
shops, and variety stores.
You can stick and smooth pieces of modeling clay together with your
fingers. No special treatment is needed.
Modeling clay does not dry or harden. It can be used many times. The
objects you make from modeling clay will keep their shape until you
reroll the clay to make something else. But, modeling clay cannot be
painted.
Chemical clay is a clay substitute you can make in your kitchen.
Pieces of this clay must be moistened with water before they will stick
together.
Chemical clay dries to a stonelike finish. Models made from chemical
clay are very strong. They will not break easily. When dry, this clay
can be painted with tempera paints (see tempera paint, page 66).
Chemical clay
(makes a lump of clay about the size of a softball)
cup cornstarch
1 cup salt
f cup water
cooking pot
old pie tin or aluminum foil
mixing spoon
I Mix 1 cup of salt and j cup of cornstarch in the cooking pot.
Slowly stir in 7 cup of water. Keep stirring until the mixture is
smooth.Ask a grown-up to cook and stir the mixture over low heat until it
is stiff, like mashed potatoes. This will take about two or three
minutes.Spoon the mixture onto a pie tin or a piece of aluminum foil. Let
cool for about ten minutes.When the mixture is cool enough to handle, press and squeeze it
until it feels like clay. This will take about three or four
minutes.To store unused chemical clay, wrap it in wax paper. It will keep
for several days. If chemical clay becomes too sticky, squeeze a
little water into the clay.
Helpful hints
(continued from page 109)
Kitchen clay is a clay substitute you can make in your kitchen.
Pieces of this clay must be moistened with water before they will stick
together.
After several days, kitchen clay dries to a stiff, hard finish. Models
made from kitchen clay are very strong. If handled with care, they will
not break easily. When dry, kitchen clay can be painted with tempera
paint (see tempera paint, page 66).
Kitchen clay
(makes a lump of clay about the size of a softball)
I7 cups flour
cup salt
cup vegetable oil
(or a few drops of liquid soap)
cup water
mixing bowl
mixing spoon
1 Mix 1\^- cups of flour and 7 cup of salt in a mixing bowl.
Slowly stir in cup of water and j cup of vegetable oil (or a few
drops of liquid soap).Squeeze the mixture for about three or four minutes, until it feels
like clay. If the mixture breaks apart while you are squeezing it,
moisten your hands with water and continue to squeeze.To store unused kitchen clay, place it in an airtight container or a
plastic bag. Keep the clay in the refrigerator. If the clay becomes
too sticky, squeeze more flour into it.
A ball of clay can be made from any size lump of clay. To make a
ball, roll the clay in a circular motion between your hands.
A coil is a ropelike piece of clay. To make a coil, roll the clay
back and forth between the flat of your hand and your work surface. Roll
from the tips of your fingers to the base of your palm and back again.
Roll with both hands from the center to the ends of the coil. Keep doing
this until the coil is the size you want.

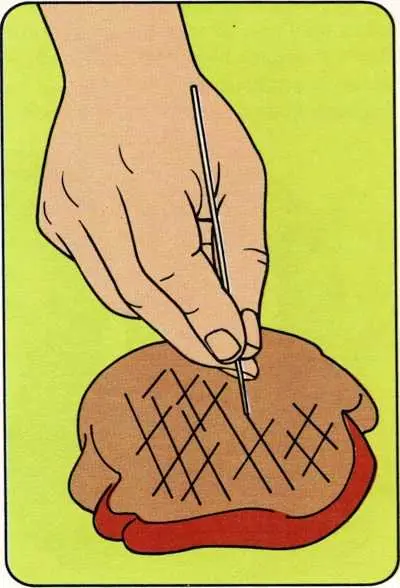
To score clay, scratch its surface with a toothpick or other pointed
tool.
To texture clay, draw or carve designs into it with a toothpick or
other pointed tool. Or use coins, bottle caps, hairpins, and paper clips
to press in designs. You can even stick things into the clay and leave
them there. You can use buttons, yarn, paper, cardboard, or any such
thing you find around the house.
To dry clay, let it stand uncovered for two or three days. The clay
will slowly become stiff and hard. But remember, modeling clay will not
harden.
To flatten clay, place the clay on your work surface and pat it with
the palm of your hand. You can also roll the clay flat with a rolling
pin.
To pinch clay, press the clay between your thumbs and your first
fingers.
—
Clay play
Read Clay (pages 108-110) before you decide what kind of clay you
want to use for this project.
Materials
clay (hardening, modeling, chemical, or kitchen)
hairpin
pencils (two)
toothpick
I Break off a lump of clay about the size of a tennis ball. Roll the
clay around between your hands. Did you get a shape like a ball? You
will begin most clay projects by making a ball.
2 Now, roll the clay ball back and forth between the flat of your
hand and your work surface. Did you get a shape that looks like a piece
of rope? This shape is called a coil.
To make a snake, roll one end of the coil a little thinner than the
other end. Use a toothpick to scratch eyes and a mouth on the thick end.
Draw squiggly lines down the snake’s back.
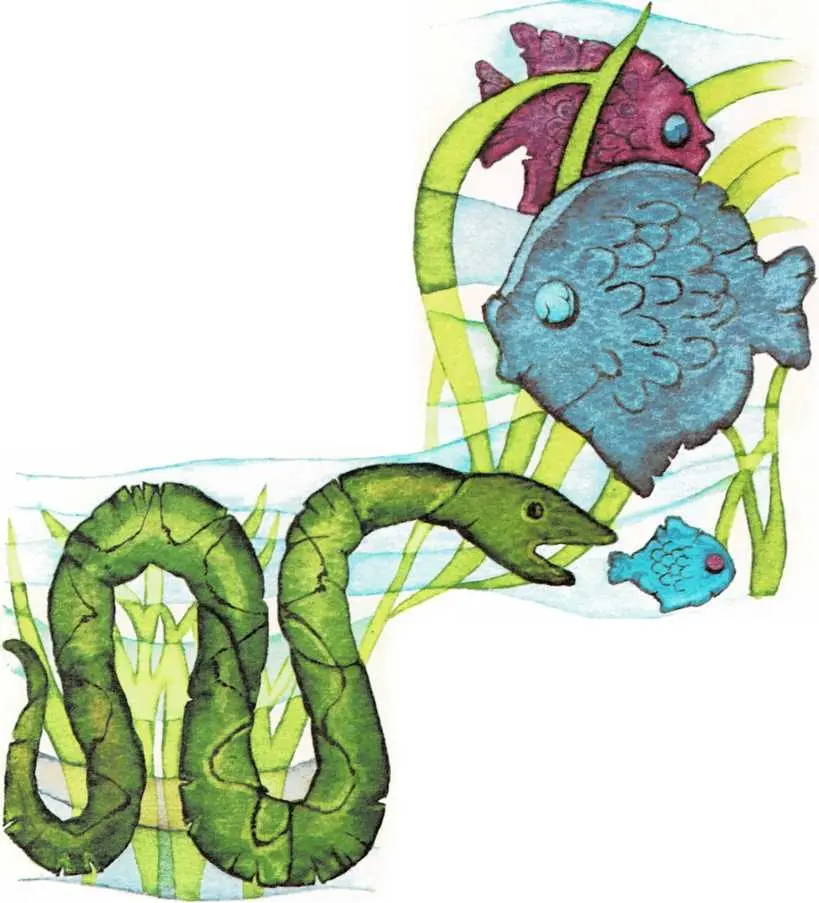
3 Roll the clay back into a ball. Put the clay on your work
surface. Pat the clay with the palm of your hand. Did you get a shape
like a big cookie?To make a fish, pinch and pull the edge of the “cookie” to make a
mouth, a fin, and a tail. Add a little ball of clay for an eye. To
make scales, press a hairpin into the clay.
4 Roll the clay back into a ball.
Pull on two opposite sides of the ball. Did you pull out two points?
To make a goofy-bird, stick two pencils into the ball for legs. Add two
little balls of clay for eyes. Use a toothpick to draw the wings.
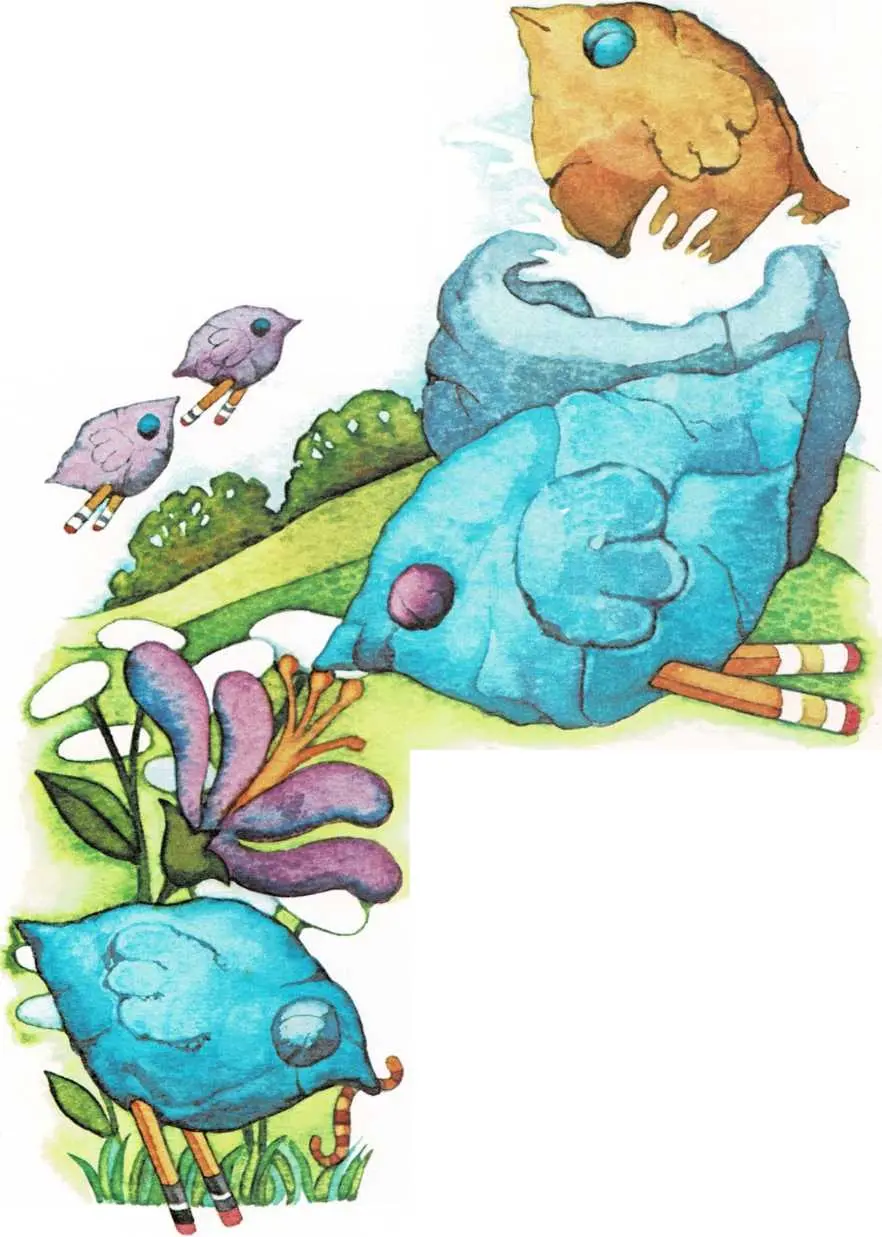
5 Roll the clay back into a ball. Poke your thumbs into the ball.
Did you make a hole?Thousands of years ago, people made pots this way. Craftsmen still
think this is a good way to make a pot.
To make a pinch pot, slowly press the clay between your thumbs in the
hole and your first fingers on the outside of the ball (see pinch,
page 111). Pinch and press the pot until the sides and bottom are of
even thickness. If you want, use a toothpick to scratch a design on your
pot.