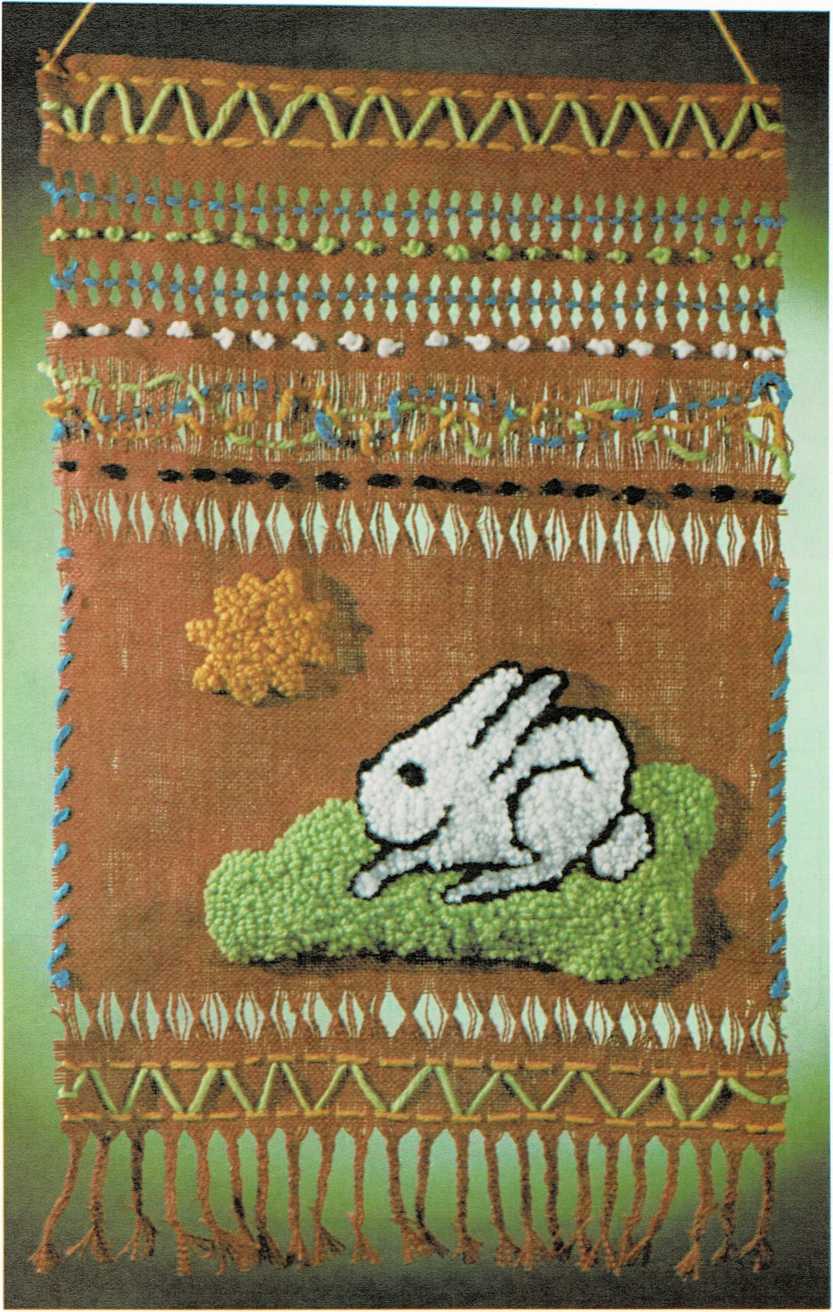
Burlap wallhanging
Materials
blunt needle
burlap
cardboard or wood strip
crochet hook
frame
glue (white)
pencil
scissors
yarn (several colors)
Cut a big piece of burlap the size you want your wallhanging to be.
Use a pencil to draw a simple design near the center of the burlap.
Your design should be about one-fourth the size of the burlap.Stretch the design part of the burlap over a frame (see frame,
page 176). Hook the design (see hooked project, page 177).At the bottom, make a fringe by pulling out twenty-five or more rows
of burlap threads. Braid the fringe (see three-strand braid,
page 181). Use the threads you pulled out to tie the ends of the
braids.At the top, fold about 7 inch (15 mm) of burlap to the back. With a
blunt needle threaded with yarn, weave a row of running stitches
through the doubled burlap (see running stitch, page 155). Leave
about 12 inches (30 cm) of yarn at each end of the row of stitches.Above and below your hooked design, pull out and weave rows of
burlap thread. Tie groups of up and down threads together. Try
twisting the groups of thread and weaving yarn through them. Try
weaving yarn between the threads (see weaving, page 178).To hang your wallhanging, you will need a strip of stiff cardboard
or wood as wide as the burlap. Glue the strip to the back of the
wallhanging at the top. Tie the loose ends of yarn from step 5. Hang
up your wallhanging.
You can make place mats and seat covers by hooking, weaving, and
stitching in burlap. You can hook a vest for yourself by tracing and
cutting out the outline of an old jacket or sweater on a piece of
doubled burlap.