

Helpful hints
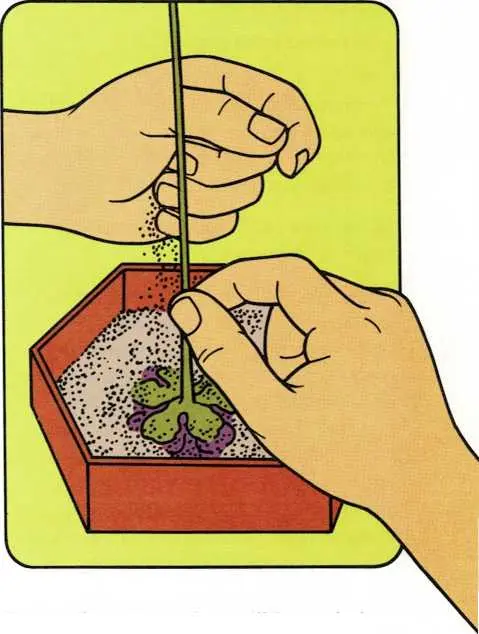
on a paper towel and let them dry for one or two days.
The following information will help you make the projects in this
section. If a special skill is needed, the directions will tell you the
page on which that skill is explained. For example: “Press the leaves
(see press, page 135).” If you do not know how to press leaves, you
will find directions on page 135.
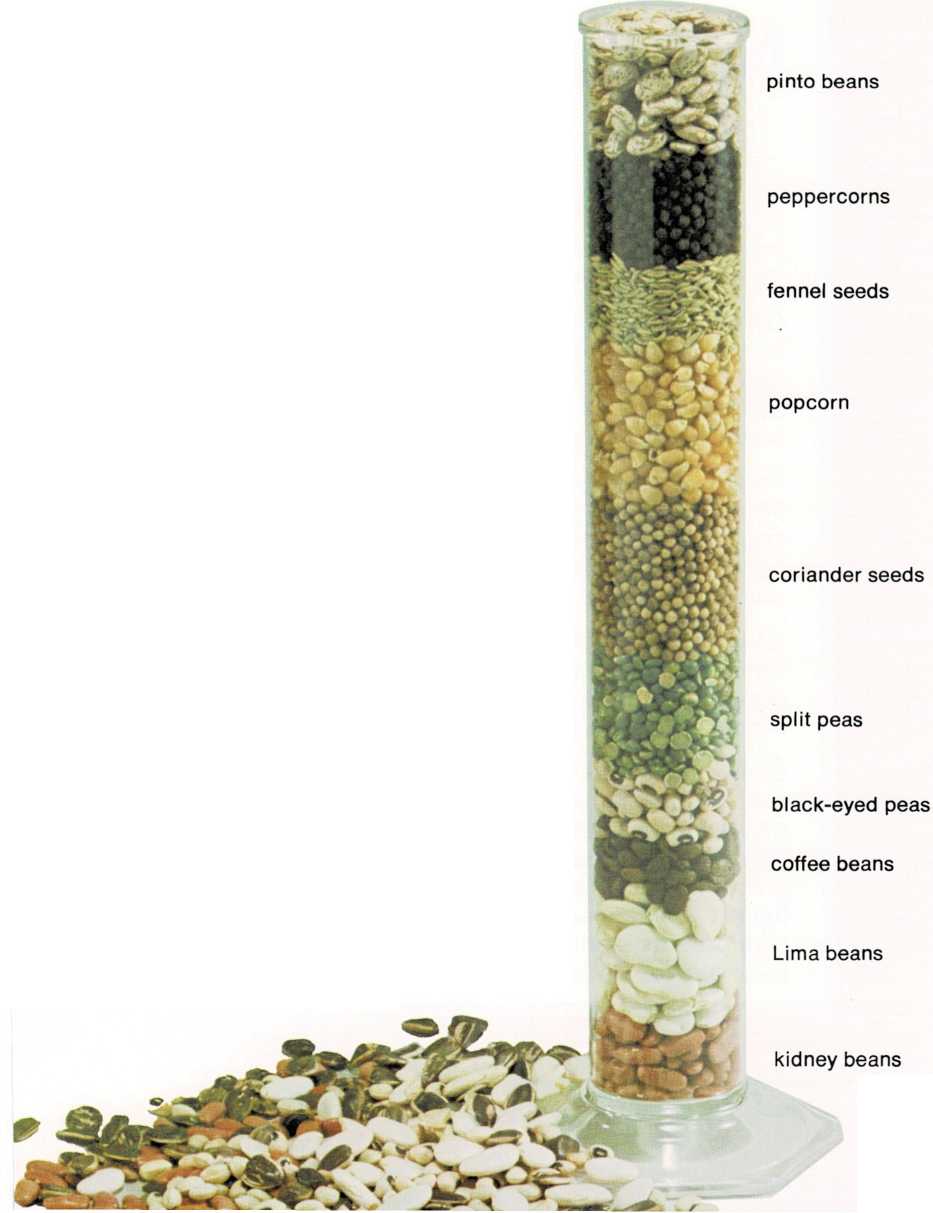
Seeds of all kinds can be used for seed projects. You can buy some
seeds in a grocery store. Others you must save. Make a habit of saving
the seeds from apples, oranges, lemons, melons, and other fruits and
vegetables. The picture shows some seeds. You will probably think of
others.
Seeds used for seed projects must be dry. Most seeds are dry when you
buy them. If you are picking seeds or have wet seeds, wash them in cool
water. Then spread the seeds on a paper towel and let them dry. This may
take one or two days.
To dye seeds different colors, put the seeds in a small throwaway
container. Mix in drops of food coloring or tempera paint until all the
seeds are the color you want. Then, carefully spread the seeds
Use a leaf press when collecting leaves. An old magazine or a large
book makes a good leaf press. Lay each leaf flat between separate pages
This will keep the leaves from curling until you can press them
permanently
To press leaves or flowers so they will last a long time, use one of
these methods:
Place the leaves or flowers flat between two sheets of newspaper. Always
press leaves and flowers separately. If you are pressing flowers, spread
out the petals. Leave plenty of space between each leaf or flower. Pile
several heavy books on top of the newspaper. Wait at least two weeks for
the leaves or flowers to press.
Or, ask a grown-up to help you iron your flowers and leaves. Place the
leaves or flowers between two sheets of newspaper. Iron the newspaper
with a warm iron.
After you press a leaf or flower, you can wax it. Place a sheet of
wax paper on top of the leaf or flower and iron first one side and then
the other with a warm iron. This will give the leaf or flower more body.

To dry flowers so they will keep their shape and last a long time,
use one of these methods:
Delicate flowers, such as babies’-breath and snowballs, will dry when
tied in bunches and hung upside down in a warm, dry, dark place for two
to three weeks. Be sure you remove all the leaves before you hang the
flowers.
Sturdy flowers, such as marigolds and zinnias, can be dried in sand. To
dry flowers in sand, pour a thin layer of clean, dry sand in the bottom
of a shallow box or pan. Place the flowers upside down on the sand.
Slowly and carefully cover the flowers with more sand. Keep the
uncovered pan in a dry, warm place for one to three weeks.
Store dried flowers in an airtight container in a dark place until you
are ready to use them.
To clean sea shells, you must remove any sand, dirt, or tiny animals
inside the shell and any hard, crusty material covering the shell.
To remove sand and dirt, wash the shells with soap and water.
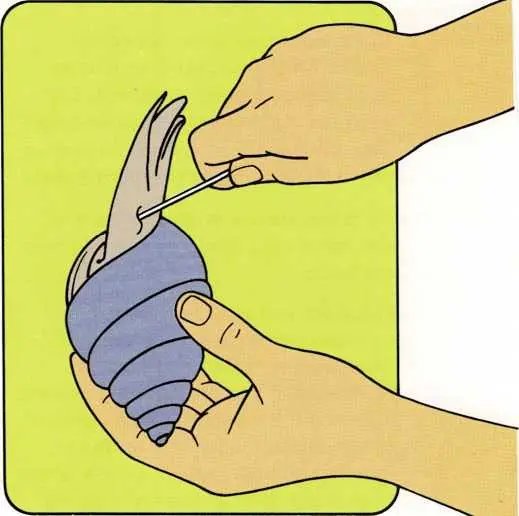
To remove any tiny animals living inside, ask a grown-up to help you
boil the shells. Place the shells in warm water. Then bring the water to
a boil. Let the shells boil about five minutes. Pour off the water and
let the shells cool. Use a small crochet hook, nutpick, or bent safety
pin to gently twist and pull out the animal. Make sure you remove the
entire animal. Otherwise, your shell will smell.
To remove hard, crusty material on the outside, soak the shells in
bleach until
the crust softens. Then carefully chip off the crust with a knife or
nutpick.
To dry sea shells, gently shake out any water inside. Wipe the
shells with a paper towel or a soft cloth.
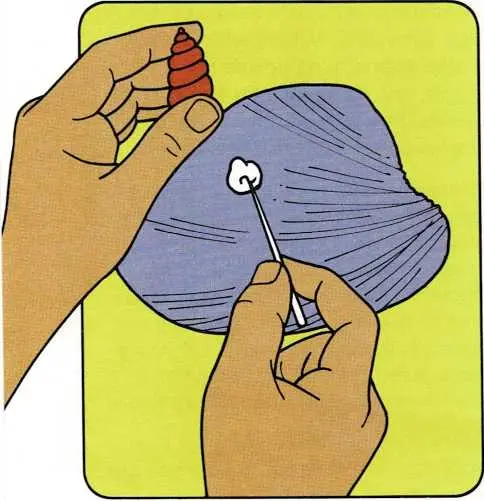
Build stone or shell sculptures with glue and cotton. Start at the
bottom of your sculpture and work up.
Pour some white glue into a foil pan or jar lid. Use a toothpick to push
a tiny piece of cotton or kleenex into the glue.
Put the glued cotton or kleenex between the two stones or shells you
want to glue together. Lean the two stones or shells against a box or
wall until the glue dries.
Let the glue dry completely before adding another stone or shell. This
might take one or more hours.